
Outdoor Energy Storage Protection
Tesla Powerwall 3 Sunny Cover
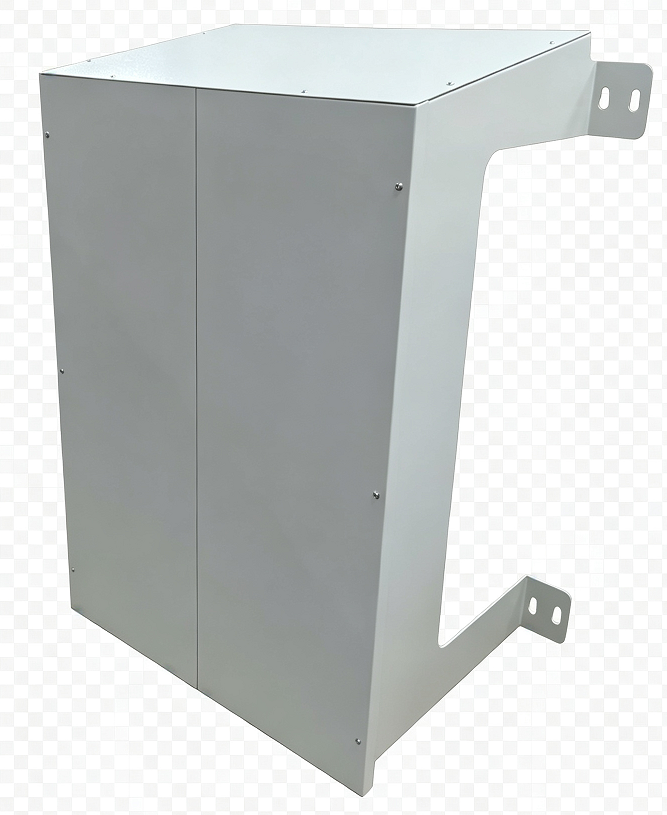
A multi-functional energy storage battery cover engineered for outdoor energy storage equipment. Perfectly compatible with Tesla Powerwall 3 and its expansion pack, as well as mainstream energy storage batteries from multiple brands. The standard version is fabricated from 5000-series marine-grade aluminum alloy, keeping it light enough for one-person handling and installation, with an industrial gray powder-coated anti-corrosion finish that delivers outstanding weather, UV, dust and impact resistance. 201 / 304 stainless steel is available for custom orders. Uniform peripheral ventilation gaps ensure unobstructed heat dissipation, prevent power derating from overheating, and extend the service life of the energy storage system. A keyhole hanging structure enables tool-free quick assembly and disassembly, balancing protection, practicality and premium appearance.
- Core fit for Tesla Powerwall 3 and its expansion pack
- 5000-series marine-grade aluminum, lightweight for one-person handling, noncombustible
- Full waterproof / dustproof / UV protection
- Peripheral ventilation gaps for heat dissipation, preventing derating
- Keyhole hanging mount for tool-free quick install & removal
- Fits 12" / 16" standard stud walls
- Ships with a full set of mounting hardware
Features
Premium Material
The standard version uses 5000-series marine-grade aluminum alloy — light enough for one-person handling, with excellent corrosion, aging and high/low temperature resistance for long-term use in humid, high-salinity outdoor environments. 201 / 304 stainless steel is available for custom orders.
Full-range Protection
Waterproof, dustproof and UV-resistant, effectively isolating rain, wind sand and dust to prevent power derating and aging damage caused by high temperatures.
Scientific Heat Dissipation
Full-circumference reserved ventilation gaps ensure smooth air circulation, guaranteeing stable battery heat dissipation and maintaining normal operating efficiency.
Easy Maintenance
The keyhole hanging mount allows quick cover removal without unscrewing, greatly simplifying equipment inspection and daily maintenance.
Wide Compatibility
Compatible with outdoor energy storage batteries of various brands and specifications, with strong versatility across scenarios.
Complete Accessories
Ships with a full set of original mounting hardware — no additional tools or parts required for out-of-box installation.
Upgraded Appearance
A premium industrial-gray powder coating delivers a refined, high-grade texture that elevates the overall aesthetic of the outdoor energy storage installation.
Noncombustible Fire Rating
All structural materials pass authoritative certification to the Noncombustible standard, meeting building fire-protection codes and eliminating fire hazards at the source.
Dual Installation Modes
Supports both Retrofit installation (fixing only the top and side studs for fast mounting) and New Construction installation (adding middle and bottom rails for high-wind zone requirements).
Precise Mounting-Hole Layout
Fits 12" / 16" studs with a 4" greatest-common-divisor hole pitch, so on-site "blind drilling" always hits a stud and reduces measuring time.
Specifications
| Max Dimensions | 1150 × 820 × 550 mm (H × W × D) |
| Imperial Dimensions | 45.23 × 32.3 × 21.7 in (H × W × D) |
| Material | Standard: 5000-series marine-grade aluminum alloy; Custom: 201 / 304 stainless steel optional |
| Surface Finish | Industrial gray powder-coated anti-corrosion finish |
| Fire Rating | Noncombustible |
| Mounting Compatibility | Standard stud walls with 12" / 16" on-center spacing |
| Net Weight | Approx. 13.9 kg |
| Included Accessories | Left & right side panels, front left/right baffles, top cover, bottom L-brackets, full set of original mounting hardware |
Workflow
Install Side Panels
Mark drilling points per battery position and stud spacing, calibrate with a level, then fix the left & right side panels to the wall.
Assemble Front Baffles
Assemble the front left and right baffles with matching screws into a complete front baffle assembly with uniform gaps and a flat surface.
Fix Front Baffle
Align the front baffle assembly with the side-panel holes and fasten the screws to form a complete, stable frame.
Install Top Cover
Align the top cover with the side-panel grooves and holes, fit it firmly, and fasten the screws to seal the top.
Install Bottom L-Brackets
Install the L-shaped support brackets at the bottom of the frame and fasten them to improve load-bearing and anti-shake performance.
Final Inspection
Check screw tightness, shell flatness and ventilation gaps; restore battery power after passing inspection to complete the installation.
Applications
Installation
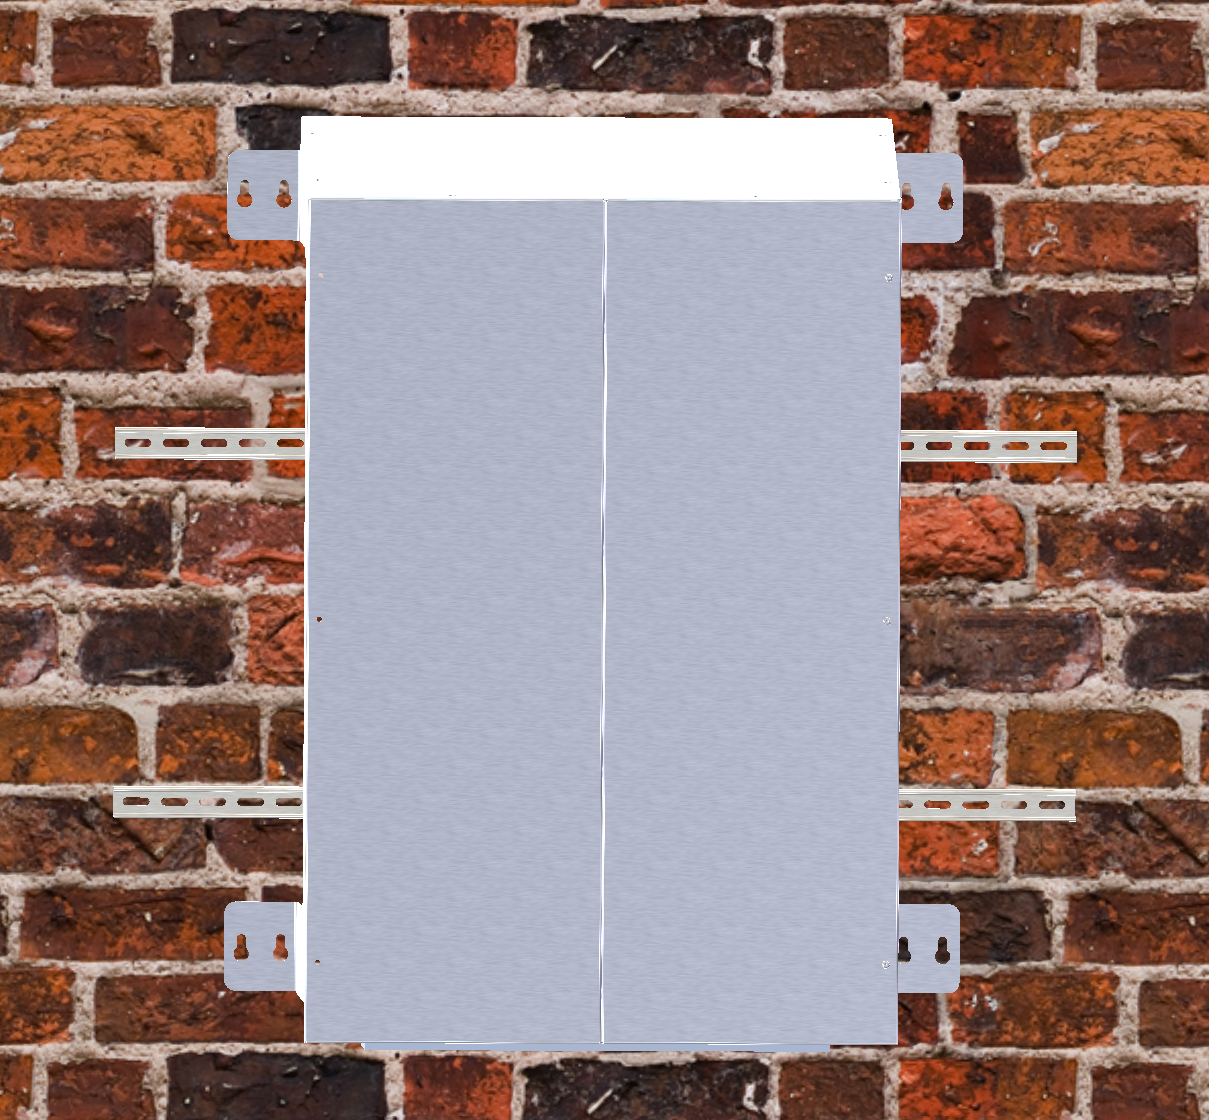
Fits standard stud walls with 12" / 16" on-center spacing. Two mounting holes on each side correspond to an OC of 813mm (16"×2) and 915mm (12"×3). Supports both Retrofit and New Construction modes, securely hanging from the top and side studs with precise hole alignment and even load distribution.
FAQ
Will installation void the Tesla factory warranty?
Compliant installation per the manual does not void the battery manufacturer warranty. We recommend confirming warranty terms with the equipment manufacturer in advance.
Besides Tesla Powerwall 3, which batteries are compatible?
Core fit for Tesla Powerwall 3 and its expansion pack; also compatible with similarly sized outdoor batteries from Sigenergy, Sungrow, Fox ESS, BYD, Enphase, SolarEdge and other mainstream brands.
Does the cover affect battery heat dissipation?
No. Uniform ventilation gaps around the shell keep air flowing to maintain stable heat dissipation and prevent overheating-induced power derating.
Is it easy to remove for maintenance?
Yes. The keyhole hanging structure lets you lift the cover off without unscrewing, for quick inspection and maintenance.
What material and fire rating does it have?
The standard body is 5000-series marine-grade aluminum alloy, light enough for one-person handling, with an industrial-gray powder-coated anti-corrosion finish suited to high-humidity and high-salinity sites. 201 / 304 stainless steel is available for custom orders. All structural materials are certified to the Noncombustible rating and meet building fire-protection codes. Net weight is about 13.9 kg.
What does installation require and how are holes located?
It mounts to standard stud walls with 12" or 16" on-center spacing, using two holes per side at an OC of 813 mm (16" x 2) or 915 mm (12" x 3). The hole pitch follows a 4" common divisor so blind drilling still hits a stud, cutting measuring time. Both Retrofit (top and side studs only) and New Construction (adding middle and bottom rails for high-wind zones) modes are supported.
Do I need to buy extra mounting hardware?
No. Each unit ships with left and right side panels, front left and right baffles, the top cover, bottom L-brackets and a complete set of original mounting hardware — nothing else to source.